

Here's how to create a simple effect to communicate to the players which objects are pickable, interactive etc.
A lot of games implemented this effect in clever ways; today I'm showing a simple version that relies on the object's vertices coordinates (like a gradient) and passing of time. The shader itself is just a handful of nodes in Shader Graph (or about 20 lines of HLSL), so it's easy to adapt to your project.
How it works
The effect reads the vertex's X position (passed from the vertex shader to the fragment shader) and combines it with _Time.y inside a cos() call. That gives you an animated gradient that travels across the object. The result is clamped to [0, 1] and used as the lerp factor between the base object color and the highlight color. Because the effect uses object-space vertex coordinates rather than world-space, it moves with the object naturally without any extra setup. The whole shader is about 20 lines of HLSL including the property block.
HLSL
Here's an example, written in HLSL. Even if this tutorial example is targeted for Unity the mechanics and logic apply to all other engines as well.
- Pass the vertex X position from the vertex function to
Input.vertexPos. - In the surface function, compute
cos(_Time.y * 4 - vertexPos)and clamp it to [0,1]. - Use that value as the lerp factor between
_ObjectColorand_HighlightColoron both Albedo and Emission.
//@febucci, https://www.febucci.com/tutorials/
//Support my work here: https://www.patreon.com/febucci

Shader "Custom/PickableObjects" {
	Properties{
		_HighlightColor("Highlight Color", Color) = (1,1,1,1)
		_ObjectColor("Object Color", Color) = (1,1,1,1) // you can use a Texture instead of a Tint
	}

	SubShader{
		Tags { "RenderType" = "Opaque" }

		CGPROGRAM
		#pragma surface surf Standard vertex:vert

		#include "UnityShaderVariables.cginc" //to use _Time

		float4 _ObjectColor;
		float4 _HighlightColor;

		struct Input {
			float vertexPos;
		};

		void vert(inout appdata_full v, out Input o) {

			UNITY_INITIALIZE_OUTPUT(Input, o);
			o.vertexPos = v.vertex.x; // passes the vertex data to pixel shader, you can change it to a different axis or scale it (divide or multiply the value)
		}

		void surf(Input IN, inout SurfaceOutputStandard o) {

			float highlight_value = clamp( //clamps the value between 0 and 1 (since "cos" can go from -1 to 1)
							cos(
								_Time.y * 4 - //4 is the effect speed
								IN.vertexPos),
							0,
							1);

			o.Albedo = lerp(_ObjectColor, _HighlightColor, highlight_value);
			o.Emission = lerp((0,0,0), _HighlightColor.xyz, highlight_value);
		}
		ENDCG
	}

FallBack "Diffuse"
}
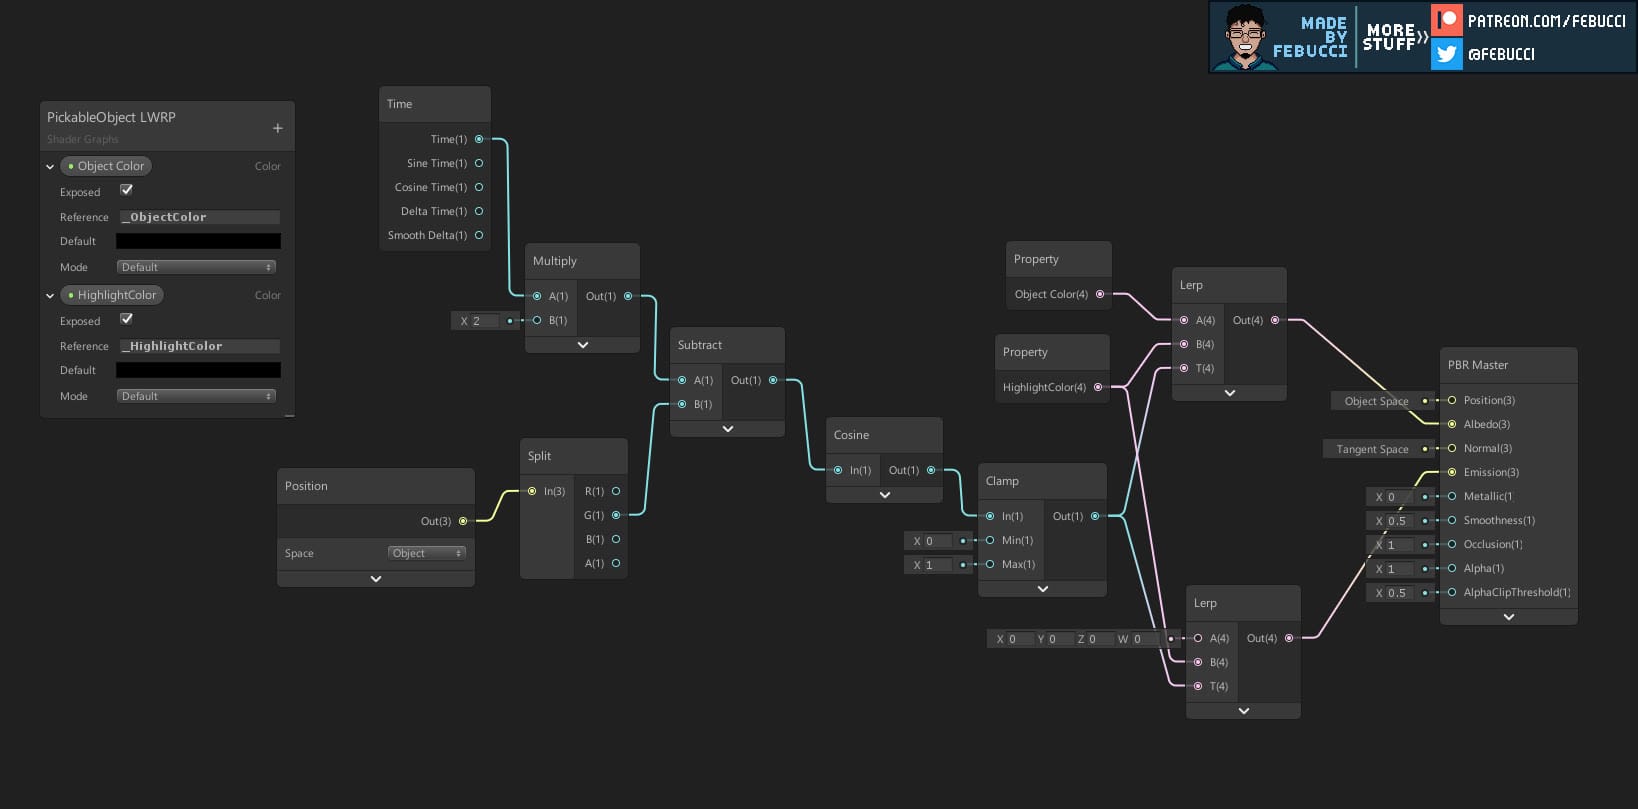
Shader Graph
Here's the same effect created in Unity Shader Graph.
To use it you must enable one Scriptable Render Pipeline in the Package manager, for example the Lightweight RP or the High Definition one.
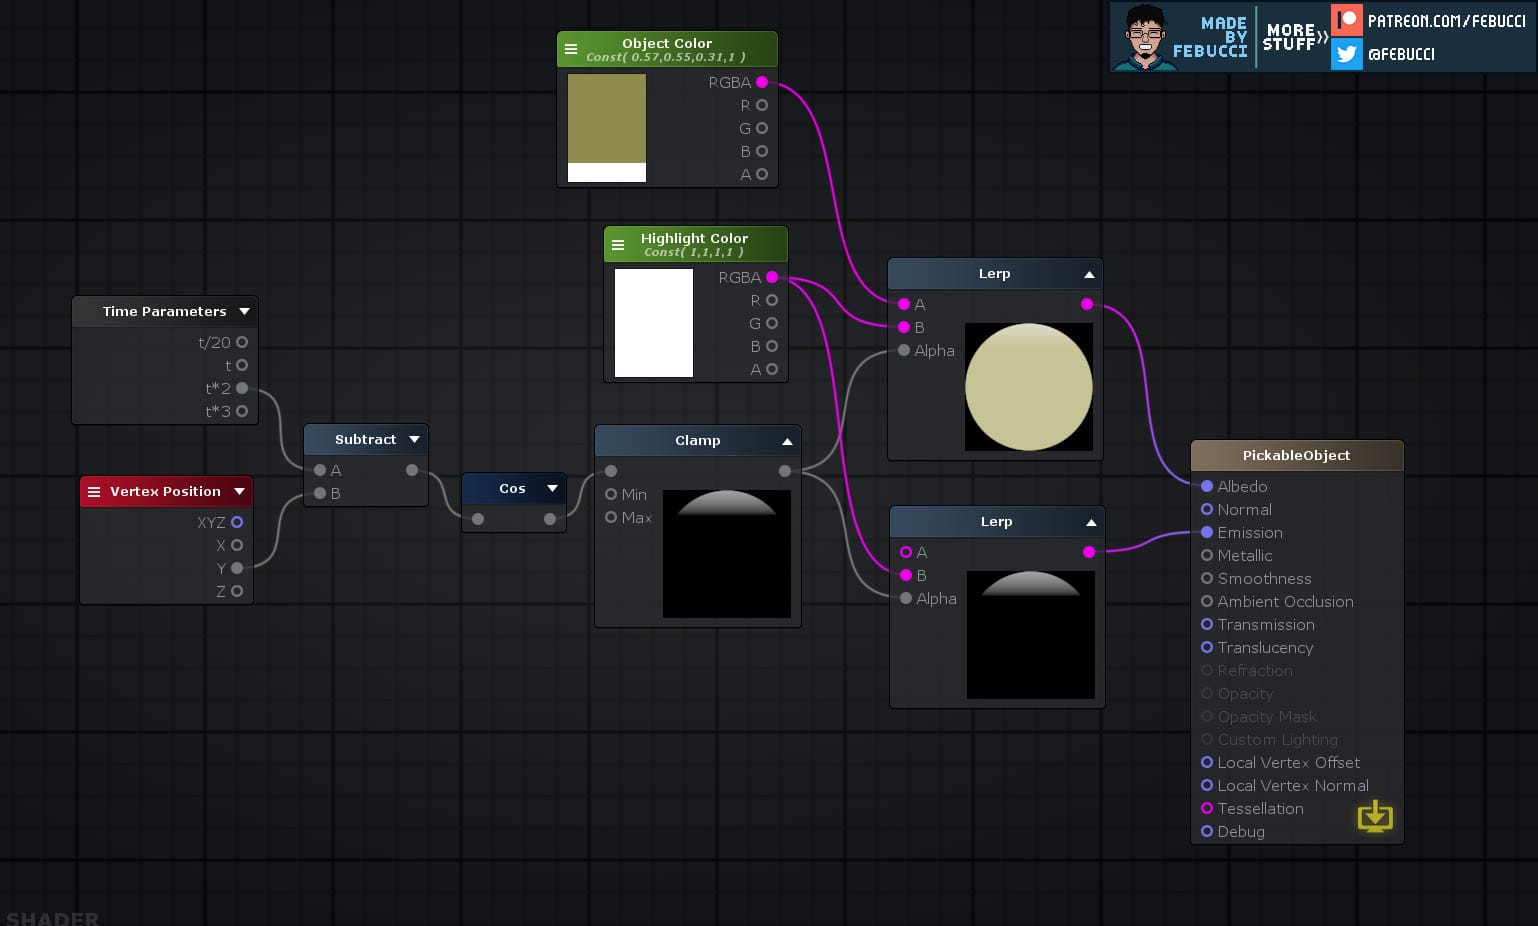
Amplify Shader Editor
Here's the same effect created using the plugin Amplify Shader Editor.
Frequently asked questions
Can I change which axis the highlight travels along?
Yes. In the vertex function, replace v.vertex.x with v.vertex.y or v.vertex.z to change the direction. You can also multiply or divide the value to scale the speed of the travel.
How do I control the animation speed?
Change the multiplier on _Time.y in the fragment shader. The example uses 4; higher values make the highlight travel faster.
Does this work in the Universal Render Pipeline?
The HLSL version uses the built-in surface shader syntax, which only works in the Built-in Render Pipeline. For URP, use the Shader Graph version shown above or convert the logic to an HLSL shader with URP's Lit shader as a base.
Can I use a texture for the object color instead of a tint?
Yes, just replace the _ObjectColor property with a 2D sampler and sample it in the surface function the usual way.

Federico is the founder and original "Febucci", developing games since 2016 and helping others do the same. Started as a solo developer and built a team around Text Animator making tools, games and traveling to events with talks and more.

Sincere posts about game development
We have been making games for more than 10 years and we want to share with you everything we have learned along this journey, from game engine tutorials to the way we see things in general, including heartfelt rants and exciting wins. If you find what we do valuable, please consider joining the newsletter!
- Exclusive insights sent via email only
- Read extra content when logged in
- Join a friendly and sincere community
- Help us stay independent from algorithms
More Posts


Comments